
Saturation and compression for a dynamic vocal
Regular readers of Jamie’s list know that I’m a bit fan of using saturation to add life and presence to sounds. Here’s a good workflow for using saturation along with compression to get a sort of retro vocal sound!
When I say retro, I’m thinking specifically of soul records from the 60s. You know how, on some of those records, when the singer really lets loose on a note, it distorts? But, like, that really nice 60s distortion that’s gritty and blown-out and exciting, but not fizzy or edgy or annoying? Check out basically any Aretha record if you’re not familiar.
Great news: you can do this with plugins!
The key is to put the saturation plugin first, before any other plugins. The reason for this is that if you compress first, all the most emotional and hard-hit notes will have been evened out by the compressor before hitting the saturation. This is a valid technique, and one that I use a lot, but it’s better for getting a more consistent saturation across the entire vocal performance. When you put the saturation before the compression, the harder-hit notes saturate a lot more than the less hard-hit notes — which is what gives it that retro vibe!
If I’m using Decapitator for this, which I often am, I might start with it set about like this (you can of course use other saturators also):
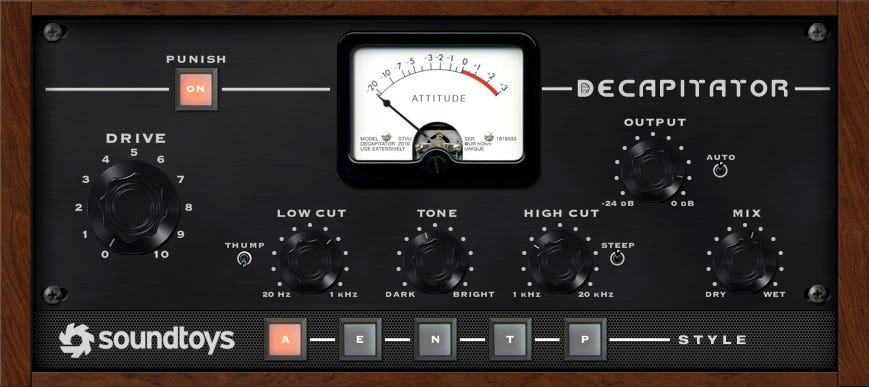
The key is to use the built-in filters to steeply roll off the high end below the frequency where it starts to sound peaky or fizzy or nasty — this is usually 2,000-3,000 Hz, depending on the singer and the performance. You might want to roll a little low end off as well so it doesn’t get boomy on low notes. And then just dial in the amount of saturation and the mix knob until you find that sweet spot where the overall vocal sound is cool to you and the loudest notes distort in the way you want!
Vintage sonic cues work great in modern contexts — jamie